Showing posts with label Blogging. Show all posts

Thursday, 18 July 2013

CommentLuv for Blogger

1. Go to intensedebate.com and create an account
2. On the top menu click on the arrow next to "Sites" and select "add blog/site".


3. Insert your blog's url in to the input box in the following form: http://yourblogname.blogspot.com then click "next step"


4. On the screen that follows you will be given the following options:
  1. Display IntenseDebate comments on:
    • Select "all new posts" if you wish to keep past comments on previous blog posts
    • Select "on all blog posts" if you wish for the IntenseDebate platform to override the default commenting system.
 

5. Keep the IntenseDebate window from the step above open since we will come back to it. Click this link -> Blogger, it will open a new tab and take you to Blogger.
6.  Click on the arrow next to the "post list" and click on "template".

7. Click the "Backup/Restore" button located at the top right.

8. The following pop up will open:
9. Save the file on your desktop and keep the Blogger tab/window open. Now go back to the IntenseDebate screen you left open without closing Blogger.


10. We are now on step number 5 in the IntenseDebate platform, click "browse" and find the file you just saved from Blogger on your desktop. Click "upload file and continue". You will be taken to the following screen:
 11. Copy and paste the text in the box on step 2 in the green box. Now go back to the following screen on Blogger and click template:


 12. Click "edit html"


13. A pop up window will open, paste the code that you copied from step 10 (the green box) replacing all the template code. Click "save template" and you are done.

Friday, 12 July 2013

How to Add Three Column Footer Widget in Blogger

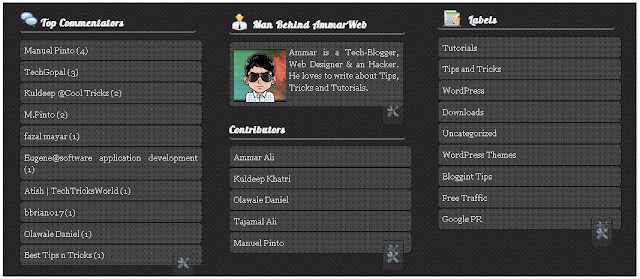
You might have seen a three column footer at many professional or commercial blogs. Where you can add stuffs. Take my three column footer as example. Footer make visitors busy and give him a good impression at End of your blog. It contains 3 columns widgets where you can add your own choice of widgets. You can easily Three Column Footer Widget and customize it as you want. If you are using WordPress Thesis Theme than check out this tutorial to add Footer Widget  in Thesis. See a screenshot.
How to Add Three Column Footer Widget in Blogger


Follow these steps, to add Three Column Footer Widget
Step 1:
Go to Blogger Dashboard > Design > Edit Html
Step 2:
Backup Your Template
Step 3:
Search for ]]></b:skin> now paste the following CSS code just above ]]></b:skin>
#lower {
border-top: #737373 6px solid;
margin:auto;
font-family: Georgia;
width: 960px;
padding: 0px 0px 10px 0px;
background:#1f1f1f;
}
#lower a {
color: #DBDBDB;
font-family: Georgia;
}
#lower-wrapper {
margin:auto;
font-family: Georgia;
padding: 20px 0px 20px 0px;
width: 960px;
}
#lowerbar-wrapper {
background:#1f1f1f;
float: left;
color: #ebedee;
font-family: Georgia;
margin: 0px 5px auto;
padding-bottom: 20px;
width: 32%;
text-align: justify;
font-size:100%;
line-height: 1.6em;
word-wrap: break-word;
overflow: hidden;
}
.lowerbar {margin: 0; padding: 0;}
.lowerbar .widget {margin: 0; padding: 10px 20px 0px 20px;}
.lowerbar h2 {
margin: 0px 0px 10px 0px;
padding: 3px 0px 3px 0px;
text-align: left;
color:#fff;
text-transform:uppercase;
font: bold 16px Arial, Tahoma, Verdana;
border-bottom:3px solid #666666;
}
.lowerbar ul {
list-style:none;
margin: 0;
padding: 0;
}.lowerbar li a {
width: 265px;
font-family: Georgia;
background: #3f3f3f;
border: 1px solid #111;
line-height: 1.4em;
-moz-border-radius: 5px;
padding: 0.5em;
margin-bottom: 11px;
margin-right: 3px;
-webkit-border-radius: 5px;
overflow: hidden;
color:#000000;
}.lowerbar li a:visited {
width: 265px;
font-family: Georgia;
background: #3f3f3f;
border: 1px solid #111;
line-height: 1.4em;
-moz-border-radius: 5px;
padding: 0.5em;
margin-bottom: 11px;
margin-right: 3px;
-webkit-border-radius: 5px;
overflow: hidden;
color:#000000;
}.lowerbar li a:hover {
background: #4f4f4f;
border: 1px solid #7a7a7a;
line-height: 1.4em;
-moz-border-radius: 5px;
padding: 0.5em; -webkit-border-radius: 5px;
overflow: hidden;
color:#000000;
}.lowerbar a {
font-family: Georgia;
background: #3f3f3f;
border: 1px solid #111;
line-height: 1.4em;
float:left;
-moz-border-radius: 5px;
padding: 0.5em;
margin-right: 3px;
margin-bottom: 11px;
-webkit-border-radius: 5px;
overflow: hidden;
color:#000000;
}.lowerbar a:hover {
background: #4f4f4f;
border: 1px solid #7a7a7a;
line-height: 1.4em;
-moz-border-radius: 5px;
padding: 0.5em; -webkit-border-radius: 5px;
overflow: hidden;
color:#000000;
}
Step 4:
Now search for </body> and paste following code just above </body>
<div id='lower'>
<div id='lower-wrapper'>
<div id='lowerbar-wrapper'>
<b:section class='lowerbar' id='lowerbar1' preferred='yes'>
<b:widget id='HTML12' locked='false' title='Testing' type='HTML'/>
</b:section>
</div>
<div id='lowerbar-wrapper'>
<b:section class='lowerbar' id='lowerbar2' preferred='yes'>
<b:widget id='Profile1' locked='false' title='About Me' type='Profile'/>
<b:widget id='HTML5' locked='false' title='Recent Comments' type='HTML'/>
</b:section>
</div>
<div id='lowerbar-wrapper'>
<b:section class='lowerbar' id='lowerbar3' preferred='yes'>
<b:widget id='HTML3' locked='false' title='Top Commentators @ AmmarWeb.Tk' type='HTML'/>
<b:widget id='HTML9' locked='false' title='Our Partners' type='HTML'/>
</b:section>
</div>

<div style='clear: both;'/></div></div>
Step 5:
Save your template .Now visit the page Layout > Page Elements and start adding widgets! :>>

Customization

You can easily customize the look and colours of the this footer widget. I have bolded the important parts in the CSS code above. Read the descriptions below carefully to better stylize your Three Column Footer Widget.
  • background:#333434; Changing the six digit colour code will change the background colour of this widget.
  • width: 960px; This is the width of the widget. If you want you can adjust this width value in accordance with the width of your blog.
  • background:#fff; and width: 32%; is the background colour and width of the three columns where the widgets are added.
  • color:#0084ce; This is the Colour of Title Headings
  • font: bold 14px Arial, Tahoma, Verdana; Edit this to change the font size and family.
  • border-bottom:3px solid #0084ce; Edit this to change the thickness, style and colour of the border that appears at the bottom of Title Heading

Thursday, 11 July 2013

Animation using CSS3 KeyFrames and jQuery's scrollTop() function


css3 keyframes

Jquery is indeed the most compressed and efficient library of JavaScript introduced so far that has made a web developer's job more easy. Its built in functions of show(), hide(), AJAX() and my beloved scrollTop() are indeed the most used functions that gives a new life to user interface (UI).CSS3 animations using @Keyframes rule is one of the most innovative things I came across so far. Pseudo elements such as :before and :after are increasingly being used now because they eliminated the use of unnecessary div tags.
These days since  I am on vocations I am trying to improve skills of both Jquery and CSS3. From the combination of beautiful web tricks that I learnt so far, I managed to design a simple scroll to top button that uses JQuery's scrollTop function to produce smooth scrolling and is spiced up with CSS3 effects to make it stand out. I have created just two sample versions with circular and rectangular shapes. The Styles are extremely easy to be customized. Lets first see a demo for the circular one:

Live Demo

Don't forget to check our previously released versions of back to top buttons:

How to add it to Blogger?

  1. Go To Blogger > Template
  2. Back up your template
  3. Click Edit HTML
  4. Search for <head>
  5. Just below it paste the following scripts:
<script src='http://ajax.googleapis.com/ajax/libs/jquery/1/jquery.min.js' type='text/javascript'/>
<script src='http://downloads.mybloggertricks.com/scrolltop.js' type='text/javascript'/>
Note: I have included the dynamic link for jquery so you wont need to update it when a new version of Jquery is released. It will update automatically.
   6.  Now Search for ]]></b:skin>
   7. Just above it paste one of the following styles
For circular one use this code:
/* ----- MBT's Back-To-Top Button Circular version -----*/
@-webkit-keyframes arrow_to_top{
    0%{
        top:10px
    }
    50%{
        top:5px
    }
    100%{
        top:10px
    }
}
@-moz-keyframes arrow_to_top{
    0%{
        top:10px
    }
    50%{
        top:5px
    }
    100%{
        top:10px
    }
}
@keyframes arrow_to_top{
    0%{
        top:10px
    }
    50%{
        top:5px
    }
    100%{
        top:10px
    }
}
#back-top, #back-top:hover{
    position: fixed;
    display:block;
    display:none;
    bottom: 20px;
    right:20px;
    cursor:pointer;
    width: 52px;
    height:52px;
    text-align: center;
    text-decoration: none;
    color: #797e82;
    color: rgba(100,100,100,0.8);
    font-size:16px;
    border:1px solid #c5ccd3;
    border-radius:30px;     z-index:9999;
    padding-top:35px;
    -webkit-box-sizing: border-box; 
    -moz-box-sizing: border-box;    
    box-sizing: border-box;             
    background: #dee1e7;
    background: rgba(208,215,222,0.5);
}
   
   
#back-top:hover{
    color:#000;
    text-shadow:1px 1px 0 #fff;
    background: #d0d7de;
    background: rgba(208,215,222,0.9);
    border-color:#8fa8c1;
}
#back-top:before{
    display:block;
    content:"";
    position:absolute;
    z-index:998;
    background: #e2e3e6;
    background: rgba(222,225,231,0.3);
    width: 66px;
    height:66px;
    border-radius:35px;     border:1px solid #c5ccd3;
    top:-9px;
    left:-9px
}
#back-top:hover:before{
    border-color:#8fa8c1
}
#back-top:after{
    display:block;
    content:"";
    position:absolute;
    z-index:10000;
    background: url(https://blogger.googleusercontent.com/img/b/R29vZ2xl/AVvXsEjsCILBKA7nhJasRpOwT9sRXf5t5ZMPwRPgGYy2XfDFurd47BD4PBqWZG_AsazYc7uR3HXWbWF0plJc101mbx8H4Ij8m0PFagkltaHX34n0RZ443CHfFxLNWUWy5NDp8ynTt7BRh1DQN3cK/s400/sprite-mbt.png) -10px -5px no-repeat;
    opacity:0.5;
    width: 10px;
    height:23px;
    top:10px;
    left:50%;
    margin-left:-5px;
}
#back-top, #back-top:after, #back-top:before{
    -webkit-transition: 0.5s;
    -moz-transition: 0.5s;
    -o-transition: 0.5s;
    -ms-transition: 0.5s;
    transition: 0.5s;
}
#back-top:hover:after{
    opacity:1;
    -moz-animation-duration: .5s;
    -moz-animation-iteration-count: infinite;
    -moz-animation-name: arrow_to_top;
    -moz-animation-timing-function: linear;
    -webkit-animation-duration: .5s;
    -webkit-animation-iteration-count: infinite;
    -webkit-animation-name: arrow_to_top;
    -webkit-animation-timing-function: linear;
    animation-duration: .5s;
    animation-iteration-count: infinite;
    animation-name: arrow_to_top;
    animation-timing-function: linear;
}
For Rectangular one use this code:

/* ----- MBT's Back-To-Top Button Rectangular version -----*/
@-webkit-keyframes arrow_to_top{
    0%{
        top:10px
    }
    50%{
        top:5px
    }
    100%{
        top:10px
    }
}
@-moz-keyframes arrow_to_top{
    0%{
        top:10px
    }
    50%{
        top:5px
    }
    100%{
        top:10px
    }
}
@keyframes arrow_to_top{
    0%{
        top:10px
    }
    50%{
        top:5px
    }
    100%{
        top:10px
    }
}
#back-top, #back-top:hover{
    position: fixed;
    display:block;
    display:none;
    bottom: 20px;
    right:0px;
    cursor:pointer;
    width: 24px;
    height:34px;
    text-align: center;
    text-decoration: none;
    color: #797e82;
    color: rgba(100,100,100,0.8);
    font-size:16px;
    border:1px solid #c5ccd3;
    border-radius:2px;
    z-index:9999;
    padding-top:35px;
    -webkit-box-sizing: border-box; /* Safari/Chrome, other WebKit */
    -moz-box-sizing: border-box;    /* Firefox, other Gecko */
    box-sizing: border-box;         /* Opera/IE 8+ */
    margin:0px;
    background: #dee1e7;
    background: rgba(208,215,222,0.5);
}

#back-top:hover{
    color:#000;
    text-shadow:1px 1px 0 #fff;
    background: #d0d7de;
    background: rgba(208,215,222,0.9);
    border-color:#8fa8c1;
}
#back-top:before{
    display:block;
    content:"";
    position:absolute;
    z-index:998;
    background: #e2e3e6;
    background: rgba(222,225,231,0.3);
    width: 37px;
    height:50px;
    border-radius:2px;
    border:1px solid #c5ccd3;
    top:-9px;
    left:-9px
}
#back-top:hover:before{
    border-color:#8fa8c1
}
#back-top:after{
    display:block;
    content:"";
    position:absolute;
    z-index:10000;
    background: url(https://blogger.googleusercontent.com/img/b/R29vZ2xl/AVvXsEjsCILBKA7nhJasRpOwT9sRXf5t5ZMPwRPgGYy2XfDFurd47BD4PBqWZG_AsazYc7uR3HXWbWF0plJc101mbx8H4Ij8m0PFagkltaHX34n0RZ443CHfFxLNWUWy5NDp8ynTt7BRh1DQN3cK/s400/sprite-mbt.png) -10px -5px no-repeat;
    opacity:0.5;
    width: 10px;
    height:23px;
    top:7px;
    left:50%;
    margin-left:-5px;
}
#back-top, #back-top:after, #back-top:before{
    -webkit-transition: 0.5s;
    -moz-transition: 0.5s;
    -o-transition: 0.5s;
    -ms-transition: 0.5s;
    transition: 0.5s;
}
#back-top:hover:after{
    opacity:1;
    -moz-animation-duration: .5s;
    -moz-animation-iteration-count: infinite;
    -moz-animation-name: arrow_to_top;
    -moz-animation-timing-function: linear;
    -webkit-animation-duration: .5s;
    -webkit-animation-iteration-count: infinite;
    -webkit-animation-name: arrow_to_top;
    -webkit-animation-timing-function: linear;
    animation-duration: .5s;
    animation-iteration-count: infinite;
    animation-name: arrow_to_top;
    animation-timing-function: linear;
}

        8.   Now just one last step. Paste the following HTML code just below <body>

<a href='#top' id='back-top' style='right:0px; display: inline;'/>
Tip: Play with border-radius property to design more creative shapes yourself!
       9.    Save your template and you are all done!
Visit your blog and scroll to bottom to see it working just fine!

Thursday, 27 June 2013

Stunning Search Box (No Button) Widget For Blogger

search box widget
Have you ever seen a search box widget without a button? Whatever your answer is, today I have a cool search box widget to share with you. As said above, the widget doesn't have any button as you think. The visitor can search by entering their query in the search box and can finish the search by pressing the enter button in the keyboard. As of all our widgets, this widget too is highly customizable and uses the default blogger search form. Want to add it to your blog? Then just follow the below steps to do so...

Adding Stunning Search Box(No Button):


Step 1: Move on to your Blogger Dashboard >> Layout >> Add Gadget:

Step 2: Choose HTML/JavaScript Gadget and add the below code into it.

<style>
@font-face {
  font-family: 'Abel';
  font-style: normal;
  font-weight: 400;
  src: local('Abel'), local('Abel-Regular'), url(http://themes.googleusercontent.com/static/fonts/abel/v3/EAqh528fFdbUek8UOky4sA.woff) format('woff');
}
.search #s {width:190px; padding:5px; border:0px; font-size:13px; color:#333; background:#d5d5d5; font-family: 'Abel', arial, serif !important;}
</style>

<div class="search"><form action="/search" class="search_form" method="get"><p>
            <input name="q" type="text" onblur="if (this.value == &#39;&#39;) {this.value = &#39;search this site&#39;;}" onfocus="if (this.value == &#39;search this site&#39;) {this.value = &#39;&#39;;}" id="s" name="s" value="search this site" class="text_input" />
            <input type="hidden" value="Search" id="searchsubmit" />
</p></form></div>
Step 3: Now click the orange save button.

Want to Make the Widget Float?


If you wish to make the widget stick to the top of the screen like our previous floating search box, then you have to add a small piece of code to the above code. The same CSS fixed property is used to do so. Follow the below steps to make the widget float...

Just below the <style> in the above code, paste the below code.
.search {
position: fixed;
right: 12px;
top: 1%;
z-index: 100;
}

Customization

  • Replace #d5d5d5 with some other color code to change the color of the widget.
  • Replace 190px with any other value to change the width of the widget.
  • "search this site" shows the text inside the search box, you can replace it with your own text.

How to Use Feedburner with Your RSS Feed

Every WordPress blog produces an RSS feed that viewers can subscribe to. But, you can’t track analytics and it is not optimized to be read easily on different devices. Feedburner is the top RSS feed delivery service. It’s owned by Google, it’s free, and it offers feed reader and email subscription options, tracks analytics, and optimizes the feed for the viewing device. Discover how easy it is to burn your feed with Feedburner and how you should link to it on your site.

Get a Feedburner Account

To use the Feedburner service you’ll need to set up an account. Since Google owns Feedburner, you can simply use your Google Account login. (If you don’t already have a Google Account, create one.)
Go to http://feedburner.com to get started.
Once your account is setup, you can burn your first feed. The image below shows three feeds I’ve already burned from BlogAid and how many subscribers they have. (Burning a feed simply means that the raw feed has passed through a feed service.)

Find Your Blog Feed URL

On WordPress sites, the URL of the feed for the blog is usually:
http://www.mysite.com/feed or http://www.mysite.com/blog/feed
Test the URL in a browser before entering it in Feedburner. If the two URL examples above send you to a 404 error page, read Locate the RSS or Atom Feed for Your Blog for more options.
Be sure to keep a copy of your site’s raw feed URL. You will need it for other applications mentioned near the end of this tutorial.

Burn Your Feed

To burn your feed, copy the URL of your site’s raw feed and paste it into the input field at the bottom (shown in the image above) and click the Next button.
In the next screen you will be able to edit your feed’s title and copy the new feed URL.
IMPORTANT: Be sure that you copy the entire feed address. Part of the feed address is above the input box and the other part of the address is in the input box (and that is the part you can edit). In the example above, the full feed URL is: http://feeds.feedburner.com/BlogaidWordPress
Click the Next button to continue.
In the next screen you will be shown the extra features that were added for you and two more that you can add. Click the Next button to do so.
Check the boxes for the additional tracking features. Then click the Next button.

Analyze Your Feed

You will be presented with a page that has several tabs across the top. Since your feed is new, you will not have any data in the Analyze tab. But check back in a few days, or a few weeks, and you’ll see activity, depending on how many subscribers you gain.
To access a feed that is already burned, simply click its blue title after you log in.

Optimize Your Feed

Click on the Optimize tab. Then click on the SmartFeed link in the left column, as shown below.
Click the Activate button. This will optimize your feed for the device on which it is being read, like a mobile device or a laptop.

Publicize Your Feed

Click the Publicize tab at the top.
Click BuzzBoost in the left column and Activate it. This will republish your feed in an HTML version for any devices that can accept it that way. In other words, it will look more like your actual blog post.
Next, click Ping Shot in the left column and Activate it. This will notify all participating services, including search engines like Google, that you have a new post available.

Email Subscriptions

Click Email Subscriptions in the left column. This is where you get the code to make your feed available via email.
Once you Activate it, you will be presented with two sections of code. Scroll down near the end of the page and look for the one shown below.
The actual URL that you need is between the quotation marks after the a href= part. In the example above, the url would be:
http://feedburner.google.com/fb/a/mailverify?uri=blogaidWordpress&amp;loc=en_US

How to Use Your Feed Links

Now you have three feed URLs.
  • The first is the raw feed from your site.
  • The second is the feed URL you received when you burned your feed.
  • The third is the URL for the email subscription.
Each feed URL has a purpose. If you are offering subscriptions directly on your site, use the two from Feedburner. If you want to send your feed to other apps and platforms, such as Facebook, use the site’s raw feed URL.
Some WordPress themes come with the familiar RSS icon displayed in the header or navigation bar. Many have two. One is for the blog post feed and the other is for the comments. Unless your blog has tons of comment engagement, it’s not likely that many viewers will subscribe to them.
You’ll want to substitute the main Feedburner feed URL for the blog post subscription link. Then change the comments link to the one for email subscription. Check with your theme developer to discover how to make these changes on your theme if you can’t easily find the code.
If your theme has no built-in icons displayed, you’ll need to add them. Several social media icon plugins include them, such as the Social Media Widget plugin.
Feedburner supplies you with images and you’ll find them by clicking the Chicklet Chooser link in the left column when in the Publicize tab. You will find code for a variety of images with links, but they are only for the blog feed.
You could also make your own links, as shown in the example on the left. It’s just a small graphic image (16x16px) followed by a text link to subscribe via a reader (which uses the main Feedburner feed URL) or via email. Simply search for an RSS icon image and resize it.
There are plenty of news sources hungry for the info you have on your site and they will subscribe to your RSS feed. I couldn’t stay on top of everything happening in my industry without the aid of my Google RSS Feed Reader. I can easily cover 80-120 blogs a month and glean the best tips they have to offer with it. That’s where all that great info in Tips Tuesday comes from! You may have noticed in the first screenshot that I have a feed for Tips Tuesday where folks can subscribe. (You can too, via a reader or via email.)

Tuesday, 25 June 2013

Move your blog Posts Title using Marquee Tag

Do you like to Add something interesting to your blogger blog? Do you want to Impress your blog Visitor? Then read this Tutorial. In this tutorial i am going to tell you how to add moving title to your blog posts ! In a word, you can move your post title in blogger blog. Its really nice am i right? You can move your posts title by just adding a Marquee Tag. You can move right to left, left to right, Alternately, Upper to Down, with color background Etc. I will tell you different marquee code for different movement.
So if you want to do this then follow the steps.
1. Open your Blogger account and open blog dashboard.
2. Open your Post Editor.
blogger post editor - hotgeekzone
3. In the Post Title you have to add the Marquee Tag code. Write your Post title with Marquee code.
hotgeekzone

Here are the Marquee codes:
For Right to Left:
<marquee>Your Post Title</marquee>
For Left to Right:
<marquee direction=”right”>Your Post Title</marquee>
For Alternate:
<marquee behavior=”alternate”>Your Post Title</marquee>
For Down to Up:
<marquee direction=”up”>Your Post Title</marquee>
For Up to Down:
<marquee direction=”down”>Your Post Title</marquee>
Marquee with Background color:
<marquee bgcolor=”black”><font color=”red”>Your Post Title</font></marquee>

You are Done ! You can see your blog Post title is moving.
Thank you.

Saturday, 22 June 2013

How To Index Your Blogs Fast In Search Engines

Indexing One's Website in Search engines and getting a good number of visitors is A Wet Dream of every site owner!

  • Write keywords At the start of your blogs

Don't get to the topic of your blog directly, instead, write at least a 100 keywords on the introduction, history, background etc of your content. These keywords can bring you numbers of visitors from Search engines depending on the content you write.

  • Tag The photos

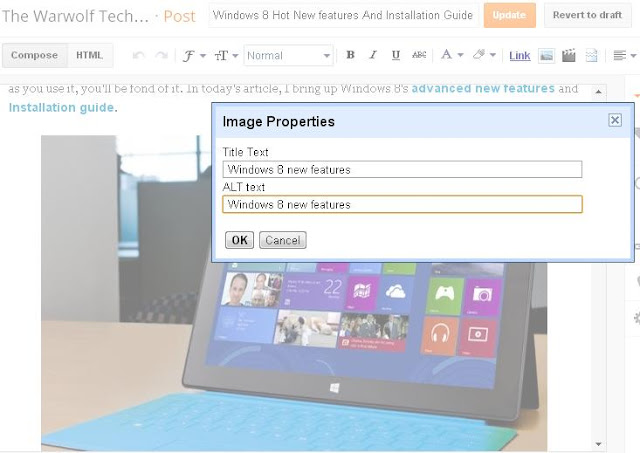
Give a tag to each photo you use in your blogs by adding Alt Text and title text

SEO For bloggers - hotgeekzone


  • Use <h> Tags

Use <h> Tags for some important keywords Under your post title or within your blogs so that Search engines popup your site at the top of search results.

SEO For bloggers - hotgeekzone


Categories/Label  Your articles.

Categorizing your articles will get you direct visitors from search engines even if your blogs don't meet their search topics or queries. 

SEO For bloggers - hotgeekzone


  • Publish your blog on social networking sites

Once you are finished writing a blog, the next you have to do is publish your blogs on social networking sites. This is the best way of getting indexed in search engines.

  • Start backlinking

Making backlinks is not as tough as people think. You can easily backlink your blogs on other sites by commenting and joining related forums.
Related Posts Plugin for WordPress, Blogger...